So you’ve just finished working on a personal favorite imagery program, and your masterpiece is ready for the art gallery, web design portfolio, or even 4Chan. But when you save this, you usually open up to this baffling array of file format options PNG, BM, JFIF, etc.
Adobe photoshop already assumes that you know the numerous differences between the various file formats are. In reality, whether one knows the differences or not, all you might want to do is just photoshop your friend slipping on a hotdog or make it look like your mother is holding the White House in her hand.
Most newbies and those who do not often work with images and photoshop need not know what the image formats mean or do. Most software enables a clear and short path for you to get the work done. If you are looking to find more information on file formats, visit AnyPDF to know more.
Getting back to photoshop and image editing software, they mostly have ready-made save options for you. This way, you get to keep your work without even having to know what storage type you are holding it in. This way, while creating programs such as Adobe, the program developers focus more on you moving your creative juices while leaving the technicality to them.
Before we state how the files differ, let us start by explaining what each format means and stands for.
Why Use Photo Editing Tools?
One of the primary benefits of using photo editing tools is the ability to correct common issues that may arise during photography. For example, you can adjust lighting, color balance, saturation, sharpness, and exposure levels to create a more visually appealing image. You can also crop or resize your photos to focus on specific elements or make them more suitable for different platforms like social media using any of the software from the best free photo editor list.
Another advantage of using photo editing tools is the creative freedom they offer. With these programs, you can add text overlays, frames, filters, and other effects that help bring your vision to life. This flexibility allows you to personalize your images for different purposes such as marketing campaigns or personal projects.
They are also great for optimizing images for different devices and platforms. For instance, you can use these tools to prepare your images for print materials such as business cards or flyers. Similarly, you can optimize your photos for social media platforms like Instagram by adjusting size dimensions.
Overall, photo editing tools are essential in today’s digital age where visual content plays a critical role in communication and branding strategies. By utilizing these tools effectively, individuals and businesses alike can create stunning visuals that capture attention and leave a lasting impression on their audience.
JPG or JPEG

JPEG is a short form for Joint Photographic Experts Group, and despite the fancy sounding tag, you do not need to be a tech whiz as this is an extremely recurring format present in the sphere of picture storage. JPEGs are widely known and made use of for numerous reasons.
A top contender for being the biggest reason is that they save a lot of storage compared to all the other formats like BMP, which used to be widely used for simplicity and compatibility across devices but has since fallen out of favor. Now, to achieve these space savings, JPEGs use what is called a ‘Lossy compression.’
So when you save an image as a JPEG, some of that image data actually gets discarded to reduce the file size. Now the way that it does this is by comparing every eight by eight block of pixels that makes up the image. A 64 standard pattern determines how much weight the image contributes to that block.
JPEG file formats can be conducive due to this reason as they save the image in the space of just 10% of the original uncompressed file with negligible loss of perceptible quality. JPEG is another way to shove your work into a smaller container, ideally without any loss in layman’s terms.
But the main catch with this is that JPEG compression works well only with picture files as images when reduced down to, naturally hiding compression artifacts. JPEG does not work that well with sharp edges on images. If you zoom into your JPG compressed image of, let’s say, a star, you’re likely to find the boundaries blurred out a bit.
JFIF Format
JFIF or Joint File Interchanging Format is another type of integrated file format that exists currently. There might be widespread confusion about this file format as it is lesser known and complicated to understand in contrast to the JPG file format. A significant factor in creating this confusion and complication is that files stored in a JFIF format are difficult to open and can be viewed or run only through specific other tools.
JFIF files are usually raw computer codes and not files such as pictures or videos, which cannot even be opened at times. To go into the details, the JFIF files are source codes that correspond to the JPG file.
To be more precise, JFIF is JPG virtual file data stored in a bitmap format. To explain what bitmap format is in a more simpler term, consider it a format where a specific set of data is mapped in correspondence to a bit of the computer memory.
This goes to say that the JPG is more of a superset in terms of both formats, where JFIF is a small subset of JPEG as it happens to be one of the building blocks in the initial stages of digital image development.
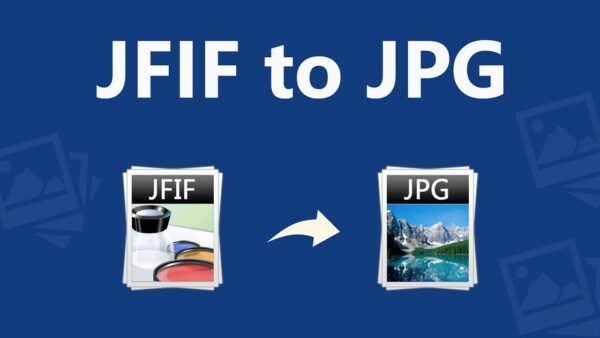
How To Convert A JFIF File To A JPG

One of the most common complaints from newbies working with image editing and storage is that they usually find their files saved as JFIF instead of JPG and can be a major inconvenience when they can’t seem to be able to open it.
Windows 10 users state a typical scenario that is presented in this problem. The image files being downloaded off the internet or the ones saved after you yourself create them result in a storage file in the JFIF format.
In order to change this, you need to go to your start button on the Windows platform, type in the registry editor and go to the dialogue box on the left. You will be presented with an array of files and options and go to the extreme top of the dialogue box.
You will have to select the HKEY class root file and find the image file. Once you find the image file, you will have to go to the extension bar on the right with specific options that are present there. Once you get to that extension option, there will be a JFIF extension on default.
This basically means that the image extension or format that you save on has been set to a default option of JFIF. Just clear out the JFIF and replace it with a ‘.JPG’ extension, and you should be good to go. All your files from here on out will be saved in a JPG format only. Apart from these minor inconveniences, JFIF is also an important file format that is essential for making use of JPG formats as well.

